I've had this problem for years where I plug my Mac (dated all the way back to 10.6 Snow Leopard) into an external display, and the text appears exceptionally fuzzy for what should be a crisp display. In my case, a Philips 298P4, an old 29" ultrawide display. Everytime a new Mac version comes out, I generally have to repeat this process. Catalina and Big Sur recently made it somewhat more complicated, but I've dug through a trove of resources on the matter and believe I've found the best, and safest fix.
The Problem
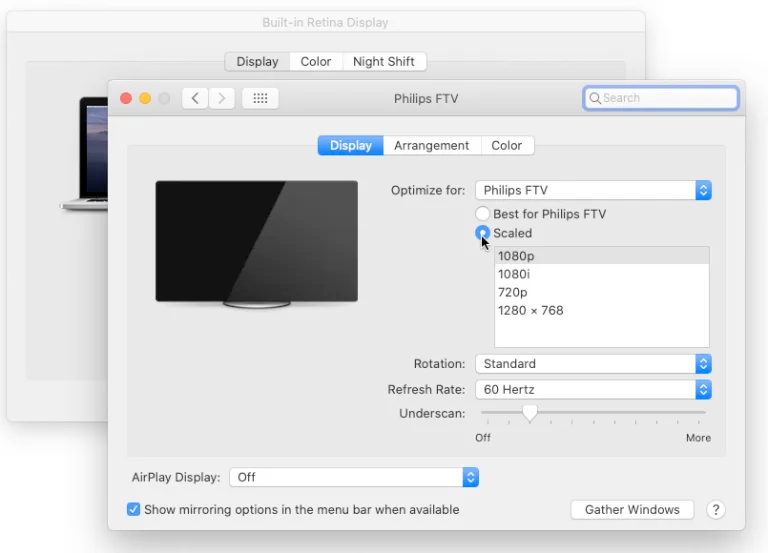
Turns out what's happening is that Mac thinks the display is actually a TV rather than a monitor, and because of that, it changes the color space from RGB to YCbCr. You can verify this by opening up the display settings, change the resolution to "Scaled" and look for values like "1080p" and "1080i".
The Fix
All we have to do is override the display so that OS X uses the RGB color space. Years ago, this meant manually editing .plist files, but some clever folks have boiled it down to a simple script that will generate the correct files for us, then we just have to put them in the right place.
1) Start by downloading Andrew Daugherity's EDID Patch here: https://gist.github.com/adaugherity/7435890
2) Unplug any other displays connected to the computer. Some recommend switching your Macbook (Pro) into clamshell mode during this step, but I've found that's not necessary as long as the only other display connected is the fuzzy display you're trying to fix.
3) Open a Terminal window and run the Ruby script from above by simply accessing the file via Terminal; an easy way to do this is just drag the .rb file from your Downloads folder directly into Terminal and hit enter:
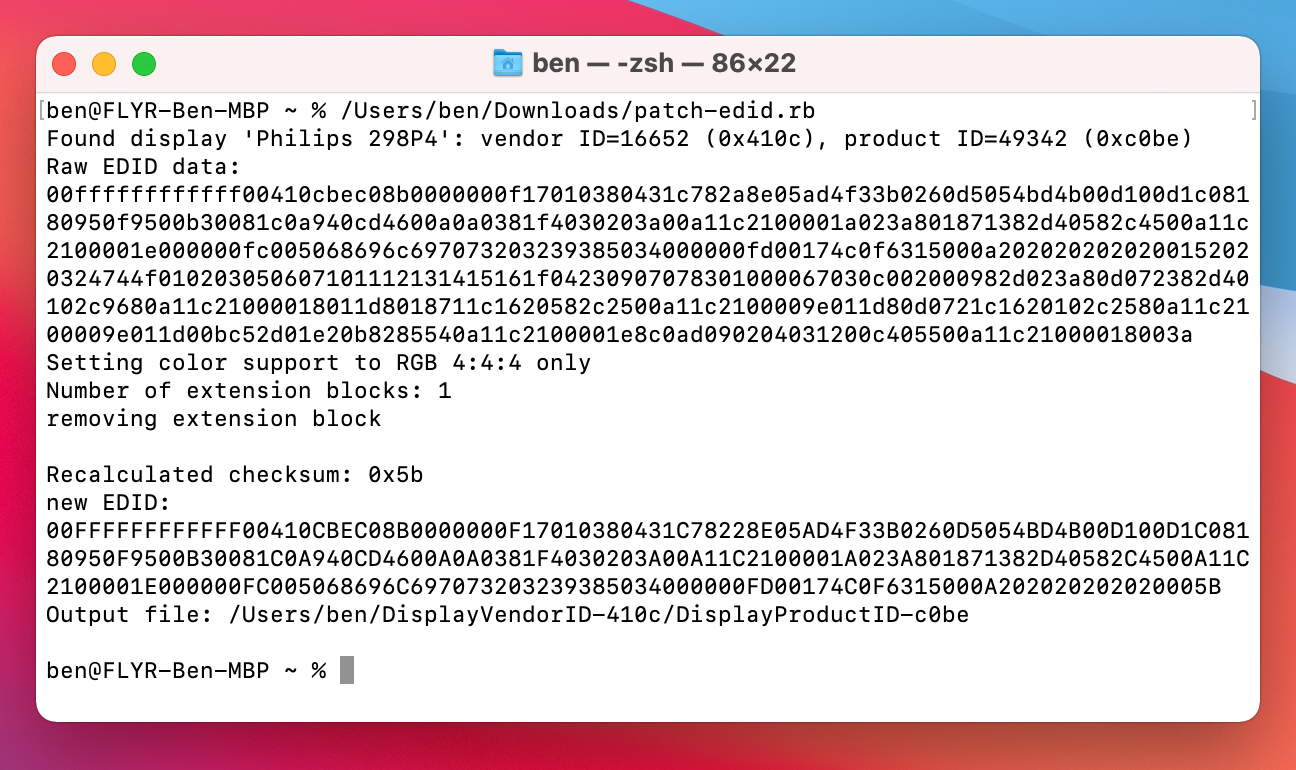
The script will "find" your display, and patch the EDID (extended display identification data) to force RGB mode on the display.
4) The script will spit out a new directory for you, likely in your root of your User folder. The folder will follow the naming convention "DisplayVendorID-xxxx" where the x's can be any alphanumeric string identifying your display.
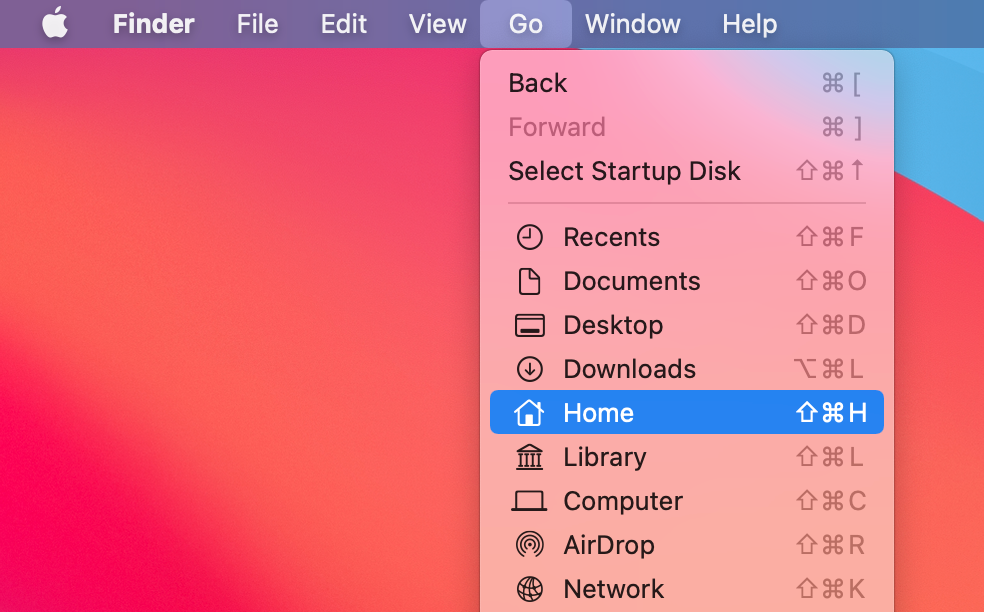
Sidenote - newer Mac's (Catalina and up I believe) will, by default, not provide you links to the root of your hard drive, so if you just open Finder, you won't see a link in "Favorites" to get to your User folder or "home". The quick fix here is select Go > Home from the header bar:
You can also use Finder > Preferences then on the Sidebar tab to show your home directory as a Favorite.
5) From your home folder, you should see the newly created DisplayVendorID-xxxx directory with a single .plist on the inside. Now all we have to do is tell OS X to use this file as an override.
The Catalina/ Big Sur Problem (skip if you don't care)
In truth, this actually started back in OS X 10.11 (El Capitan), but in short, a new "feature" called "System Integrity Protection" was introduced. This protection effectively prevents users and even apps from modifying any system files. There are workarounds that involve disabling this protection via booting into Recovery Mode, but the problem actually gets even more complicated in Catalina, and even more so in Big Sur.
Starting in Catalina, the Mac OS was split into two partitions, a "system" one, and a "data" one. The "system" one, usually just called "Macintosh SSD" or "Macintosh HD" is read-only. Meaning even if we disable SIP, we still won't have permissions to mount and modify the "system" partition. Again, a series of booting into Recovery Mode, disabling SIP, and mounting the drive could solve this, but Big Sur brought another issue:
Not only is there a separate read-only partition for the system in Big Sur, but that partition is also signed, meaning you can't just disabled SIP and mount as root. There are steps to get around this, but they are increasingly destructive to the integrity of macOS. Namely, the guides I've seen involve disabling FileVault (potentially permanently!) and potentially corrupting your Mac's ability to boot.
The Easy Workaround for Big Sur and Catalina
Without needing to reboot, disable SIP, or mount the core system partition, we can simply create the directory ourselves in our user (data) partition that is "linked" to the system partition, and thus recognizes the override file:
6) We need to create the Displays > Contents > Resources > Overrides directory on our data partition. The easiest way to do this is to return to Terminal and type:
sudo mkdir -p /Library/Displays/Contents/Resources/OverridesSudo provides us the root access we need to modify the Library files, even though this the Library directory on our Data partition, rather than the System partition which is notably separate, protected by SIP, read-only, and signed.
mkdir -p translates to "make a directory" and the -p flag, short for parents allows us to create multiple directories, one at each level if needed.
/Library/Displays/Contents/Resources/Overrides is the series of folders we need to create. Odds are your machine already has the Library/Displays folders, but everything else may need to be created.
7) With the directories created, you may navigate to it using Finder, or simply type:
open /Library/Displays/Contents/Resources/OverridesAnd a Finder window will open to that location.
8) Next, in your original Finder window that's in your home folder, drag-and-drop the previously generated DisplayVendorID-xxxx folder into the Overrides folder we just opened. Mac may prompt you to authenticate or enter a password to do this action.
9) Lastly, unplug and replug your external monitor in. If it looks the same, restart your computer. All we need is macOS to start looking at our override file. Since Mac will treat the monitor as a new display based on the override, any settings including arrangement of your displays has been reset.
You can be sure it's using the override if, when you open the display settings, the display name is appended with EDID override. It should also be materially more crisp.
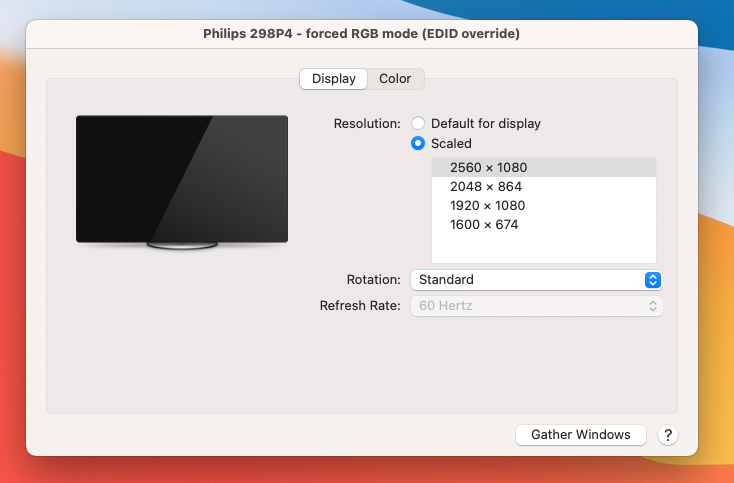
You'll also notice that any other options for scaled display resolutions like 1080p, 1080i, etc. are gone.
The All-In Solution (use at your own peril)
Marc Bruggmann, noting the fix from above, created an all-in-one script that generates the EDID override, then creates the necessary directory and moves the files in accordingly. While I'm inclined to believe this will work, because it attempts to automate the whole process, there may be scenarios not yet encountered or coded for. Explore this approach at your leisure: https://github.com/mbruggmann/osx-edid-overrides
Lastly, there is a ton of conversation that has happened on the original script Gist on Github. You might check there for any further or ongoing discussion regarding this issue.

Member discussion: